Difference between revisions of "Gill/Gallery"
From The Bakugan Wiki
m (clean up, replaced: → (91)) |
m (clean up, replaced: → (91)) |
||
| Line 1: | Line 1: | ||
| − | {{BakuganTabsLite|active=gallery}} | + | {{BakuganTabsLite|active=gallery}} |
==Anime== | ==Anime== | ||
| − | <gallery | + | <gallery widths="120"> |
| − | Screen_shot_2010-03-01_at_11.31.51_PM.png|Gill | + | Screen_shot_2010-03-01_at_11.31.51_PM.png|Gill at Bakugan.com |
| − | Screen | + | Screen shot 2010-08-31 at 1.05.57 PM.png|Gill and Krakix being introduced to the [[Battle Brawlers]] |
| − | gill | + | gill intermission screen.png|Gill and Krakix on the Intermission Screen |
| − | 5665.jpg|Gill | + | 5665.jpg|Gill taunting Kazarina |
| − | masterservant5agi.jpg|Gill | + | masterservant5agi.jpg|Gill telling [[Sid]] to leave the Brawlers alone |
| − | Gill2barodius.png|Gill | + | Gill2barodius.png|Gill informing [[Barodius]] that he was unable to locate The Element |
| − | Picture | + | Picture 12345.png|Gill listening to [[Zenet]]'s attempts to explain herself |
| − | Picture | + | Picture 277.png|Gill ordering Krakix to scan the Second Shield |
| − | Picture | + | Picture 377.png|Gill about to eliminate Zenet |
| − | 1123131.png|Gill | + | 1123131.png|Gill about to fight the Battle Brawlers |
| − | Card | + | Card NPC Gill.png|Gill at Bakugan Dimensions |
| − | GillT1.PNG|Gill's | + | GillT1.PNG|Gill's challenge at Bakugan Dimensions |
| − | GillB1.PNG|Gill's | + | GillB1.PNG|Gill's Pyrus Krakix |
| − | GillB2.PNG|Gill's | + | GillB2.PNG|Gill's Pyrus Gren |
| − | GillB3.PNG|Gill's | + | GillB3.PNG|Gill's Pyrus Lumitroid |
| − | Gill.PNG|Gill | + | Gill.PNG|Gill at Neathia at Bakugan Dimensions |
</gallery> | </gallery> | ||
Latest revision as of 08:32, 12 January 2019
| Main | Gallery |
Anime[edit]
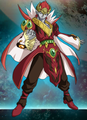
Gill at Bakugan.com
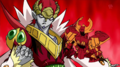
Gill and Krakix being introduced to the Battle Brawlers

Gill and Krakix on the Intermission Screen

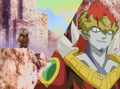
Gill taunting Kazarina
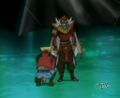
Gill telling Sid to leave the Brawlers alone
Gill informing Barodius that he was unable to locate The Element
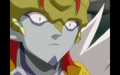
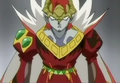
Gill listening to Zenet's attempts to explain herself
Gill ordering Krakix to scan the Second Shield

Gill about to eliminate Zenet
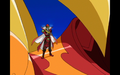
Gill about to fight the Battle Brawlers

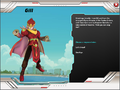
Gill at Bakugan Dimensions
Gill's challenge at Bakugan Dimensions

Gill's Pyrus Krakix

Gill's Pyrus Gren

Gill's Pyrus Lumitroid
Gill at Neathia at Bakugan Dimensions


